The
Alexandra Technique.
This is a tale of a boat and the people it has brought together. When Luc
Decramer bought Alexandra he surely had no idea what he was letting himself
in for. He had wanted a classic yacht for many years and finally found what
he was looking for in Alexandra. She was a racing yacht from 1943 and he
bought her on the spot. Since then everyone who has come into contact with
the boat has been on a huge learning curve, myself included.
Luc’s first surprise was that his boat was one of the famed 6 metre class.
Designed by Knud Reimers and built in Geneva in Switzerland. His second
surprise was that she leaked like the proverbial sieve. No better analogy
could possibly serve. It was at this point that I entered the fray. I went
to see the boat which was truly sinking. We lifted her out to see if we
could come at the leak. The first thing we discovered was a patch of
fibreglass stuck to both sides of the hull in the area of the mast step. Not
a good sign. One of the crew members said he had known the boat 15 years and
it had always leaked really badly.
I was not optimistic about fixing the leak. I ripped off the patches and
found a host of repairs all done in a hurry at different times by different
people. I said that I might be able to stop the main leak but didn’t see
that my efforts would be any better than the dozen or so ship wrights that
got here before me. I did stop that leak but still she leaked really badly.
One crew member was required just for pumping and he spent most of the time
up to his knees in water. They also had an electric pump that sent out a
continuous stream of water. Clearly something needed to be done.
Luc loves his boat and wanted it not to leak so he asked if I would like to
do the work. I did. So we set about trying to get over all the obstacles
that this decision had set in motion. First we needed somewhere to do it.
Not so easy here on the Riviera. Most yards are suspicious of wooden yachts
since they are always there longer than expected and space is so limited
that the only way the yards make money is by turning over hundreds of boats,
they simply are not interested. I went everywhere and asked everyone but
nothing could I find even vaguely suitable for a boat that is over 11 metres
long and 3 metres high. In the end an acquaintance put me in touch with a
crazy French man named Jacques.
I went to see him and the barn that he was offering. His farm is a few miles
from St Tropez quite in the country and perched on a hill with a lovely view
of the bay of St Tropez. The barn was great but it was only 10 metres long
but that could be solved by leaving the doors open and building a small
alcove. My main concern was the bumpy, muddy and hilly driveway which was 2
km long. As for turning the boat around once there I wasn’t confident. I
told Jacques that if the transporter said he could do it I’d take it.
Next I called José who had been recommended to me by a mate. José is a tiny
French bloke, even smaller than me yet he is fearless. We went to see the
barn and I asked if he thought he could do it. “Pourquoi pas” was his simple
reply. On the appointed day he turned up 4 hours late and by the time we got
to St Tropez it was lunch time so we took this opportunity to get fuelled
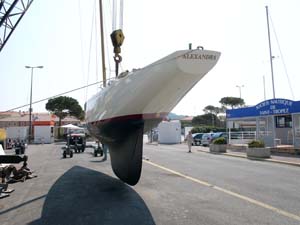
up. It was going to be a long day. At about 16-00 M. Arman strolled down to
lift us out. His ancient yet well used and greased crane plucked Alexandra
out and in one fluid movement and with millimetre precision he placed it
gently on José’s trailer. When we finally got away we drove straight out
into a traffic jam. Since it was November the days were not too long and it
was getting dark as we arrived. Half way up the drive José’s 4x4 couldn’t
manage Alexandra’s 4 tons on its own so we had to add Luc's car before we
got to the top.
By now it was dark. All Jaques’ family were out and the scene was lit by
torches and headlights while José did the impossible and turned the boat
around and backed it up to the shed. Getting this far was a good sign but we
still had to get her off and into the shed. I for one was keen to see how
José planned to do that since his trailer was higher than I’d imagined and
as a consequence the boat was 20 cm higher than the door way. There was a
huge concrete beam over the door way there was no way to make the hole
bigger. José was unfazed and proceeded to reverse Alexandra in. By lifting
the front of the trailer we could lower the stern. We managed to get in a
few metres until we touched the beam. To gain precious millimetres we
removed a myriad of deck fittings, winches etc and inched in bit by bit. In
the end we even let all the air of the tyres. The best we could do was to
get her in far enough so that we could suspend her from the beam above the
entrance. José had a huge 10 ton chain hoist and since Alexandra had lifting
eyes it wasn’t too hard to hold her up while we tried to get the trailer
out. Even with the wheels removed it was no easy task removing the trailer
but remove it we did. I chocked up Alexandra and we all went home. It was
after midnight.
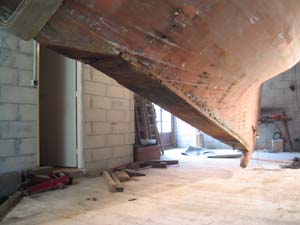
So now we had her just metres away from where we wanted her and the saying
“so near and yet so far” suddenly made sense to me. In order to get her in
we would have to fit RSJs to the barn. This we did and two weeks later we
walked her in with the aid of 4 little chain hoists and some borrowed
strops. Then we closed the doors a bit and built the alcove. While we were
fitting the beams Gus, my faithful assistant was busy stripping off the
paint so we could see what was wrong. The worst discovery was the broken
keel. That was a bit of a shock. It had been like it for a long time, that
much was obvious.
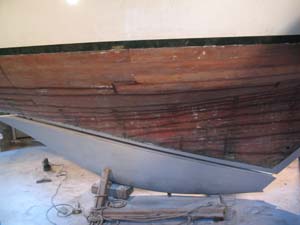
How can a 3 ton lead keel snap in two? You’re probably asking yourself. It
happened something like this: Despite having already designed a few 6’s,
Reimers somehow miscalculated the weight of the keel and the boatyard later
removed a huge cube from the back of it. I calculated it to be roughly 500
kilos. I suspect they wanted to remove more but they couldn’t. As it was
they cut out a hole so big between two keel bolts that both bolts were
visible when I removed the wood. They had cut deep, leaving only about 8 cm
at the bottom. The keel is round underneath so there wasn’t really much
holding it in one piece. I think this would have been OK had the yard not
fitted the wood so snugly leaving no room for when the wood swelled. This
and the fact that the lead at the bottom of the keel was of bad quality
meant that when the wood swelled the force was so great that it simply
snapped what was left.
The front section of the keel had dropped by about 7mm and this huge gap
between the lead and the keelson had been filled with sikaflex and painted
over. The crack on the keel had been filled with car body filler. I reckon
it had been like that for decades. Here was a show stopper. What were we to
do? My obvious reaction was to get someone else to do it but fate conspired
against me. The original keel bolts were made of Iron and cast in place. The
bolts had corroded and swelled in their holes so I very much doubted if the
boat would lift off the bolts and I certainly didn’t have the room above the
boat. I would have to cut through the bolts. That action alone would mean
making a new keel with the added difficulty of casting in 5x 30mm keel bolts
and 6x 20mm floor bolts in exactly the same place as before! Then there was
the fact that the keel is a bit bulbous which would mean a complicated mould
because you wouldn’t be able to lift out the keel without separating the
mould. After much deliberation I decided to make a new keel. Luc agreed and
so we set off on a great adventure. Jacques had no problem with us making a
keel by the barn so there seemed no reason why we couldn’t do it. I had no
experience making keels. I never once thought I’d have to do so. How many
times have you come across a snapped keel?
Where do you start? I knew that people had done similar things in gardens
and boatyards manage to do it. I searched the internet but didn’t have much
joy. I discovered that Lead melts at about 570 degrees Celsius. I found a
few sites of companies that make keels but little on DIY keel making. One
crazy bunch of Americans tried but their wooden mould leaked then burst into
flames. Basically I was on my own. We would need some lead, 3 tonnes just to
be sure we had a bit extra. The decision to use new lead was taken
collectively after I discovered that the whole starboard side of the keel
was crumbling away. Since Alexandra was built during the war it was a fair
guess that the lead may not have been of the best quality, the demand for
bullets being what it was. Boat keels are not made of pure lead, they must
have between 3 and 6% Antimony. The price for this Antimonial lead varied
hugely ranging from about 3000€ to over 8000€ suffice to say we opted for
the cheaper of the two which came from Belgium in ninety 35 kilo pigs. It
was delivered by an artic truck even though I told the transport company
that we were in a place that is inaccessible. That was fun, I met with the
driver and he followed me to Jacques. I never would have thought it
possible. He got as far as Jacques’ drive and even then turning around was
not easy but he did a fantastic job. He told me if he had known where I was
taking him he wouldn’t have come. I knew that, that’s why I didn’t tell him!
The pigs were dumped on the road and we loaded up Jacques’ Land Rover three
times and soon we had an ugly pile of lead outside the workshop.
I didn’t have much joy finding out about mould making. I suppose I should
have made a steel mould in two halves but that seemed to me to be rather
expensive and difficult to get those lovely curves right. I didn’t know how
the sand technique worked and didn’t see how I could cast bolts in with any
accuracy. In the end I discovered that there was a high temperature resin
that might work. Rob Francis at Borden Chemicals was brilliant and I decided
to make a mould using their Phenolic resin. When it burns it carbonises but
stays in shape. The only draw back is that it gives off moisture as it fully
cures. I did some experiments on a small scale. The moulds I made withstood
the molten lead but bubbled a bit as the resin gave off water. However this
did not affect the final product and I can’t help feeling that the bubbling
lead assists in removing any air pockets that might occur.
Before I could make a mould I had to remove and reassemble the old keel.
With a reciprocating saw and a long blade I cut through the keel and floor
bolts. Just before I cut the last bolts I made up a crude cradle on greased
boards to allow me to move the keel out from under the boat. The boat was
supported by strops under the stern and bow. I cut the bolts, the hull
popped up free of the burden. The hull on a 6 metre accounts for only about
25% of the weight of the boat. With the keel off I saw that the keelson was
bowed as a result of the snapped keel. I chocked the boat up with all it’s
weight on one point in the hope that when I was ready to fit the keel it
would have straightened up a bit. Not only was the keelson bowed, so too was
the stern post. I removed the steel floors, the only part of the boat not to
have moved, so that the hull could relax. If you looked along the hull
planking you could see that where the floors were the hull seemed to be
bulging out.
Moving the keel about was done with a couple of chain hoists. I welded crude
eyes to the old keel bolts and lifted it up a bit so that I could work on
it. Once the two pieces were back together I set about making the shape
smooth again. I also had to take into account a shrinkage of about 3%. On a
3 metre keel that’s about 30mm along it’s length but just a few across it’s
width. I added filler to the keel to extend and widen it. This was a horrid
job and very dusty. I used a ridiculous amount of filler, some 12 kilos.
When it was shaped it looked great and I painted it and applied wax so that
the mould would release when cured.
I then laid up a few laminates using chopped strand mat and the phenolic
resin. The problem with the resin is that it only cures with temperature. I
was doing this in December. I hired a space heater and stoked the fire up. I
managed to get the resin to cure enough to be able to remove the mould. But
because of the slightly bulbous shape I had to cut it in half to get it off.
I then moved into the kitchen, right infront of the fire. I used all the 25
gallons of resin and ended up with a fairly solid structure. The resin is
salmon pink as it starts to cure then goes a deeper red.
Next task was to make a framework that could be attached to the keel bolts
to so that they would be in the right place when cast in. This I did using
angle iron and thin rod. The keel bolts were remade and fitted into the
original holes in the keelson. I then welded them together to ensure they
would stay in the same place. The floor bolts would be tapped in later.
One other task I had to do was making the keel the same weight as it was
before but without being weak as it was before. I finally discovered these
bricks that are very light and could easily withstand the heat. I cut these
and bolted them to the framework. One cubic centimetre of lead weighs 11
grams so it was easy to calculate how much brick to insert in the keel. It
was possible to remove the same weight as before yet not from the same
place. I wanted to leave a decent wall thickness so put bricks in between 4
bolts and not two as before.
There was yet another issue to complicate matters further and that was that
the boat was still sitting stern down despite the huge block of lead the
original builders had taken out. Luc was talking about fitting an engine so
it made sense to try to move some of that weight forward. The best I could
manage was to move 100 kilos forward by about a metre. Would it make much
difference? There would be only one way to know for sure and that would be
to put the boat in the water and that was a long way off.
All these decisions made, it was time to consider the actual casting of the
keel. The local scrap yard cut a huge steel gas cylinder in two for us but
wouldn’t deliver. Luckily Jacques came to our rescue, and not for the first
time either and put it on his trailer. This was placed on the remains of the
RSJs and 4 huge bricks, the same type used inside the keel. Each one can
take a 54 ton load despite being really light. Jacques donated a rectangular
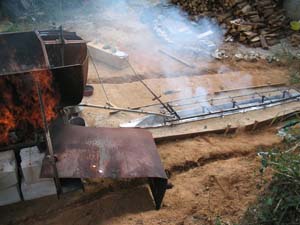
water tank to act as a grate. I cut it up and made holes in the bottom. A
trough was dug under this in the hope that the fire could get more air. A
way was needed to control the flow of molten lead so I concocted a valve
from 20mm bar ground to a point at one end. This was inserted into a steel
gas pipe fitting welded to the bottom of the cauldron. A lever was attached
so that it could be moved up and down without getting near the fire.
The 3 tons of lead was moved again, not far but humping ninety 35 kilo pigs
4 metres and up one metre is no easy task. They were stacked neatly in the
cauldron. Three tons of oak was ordered from a local wood yard. Sounds like
a huge amount I know but I thought it best to have too much than not enough,
besides we needed fire wood for the workshop, it can get quite fresh in the
winter.
The mould with its framework, keel bolts and bricks was placed into a hole
that was dug by Cristophe in his mini digger but he sliced through the water
supply to the workshop which was interesting for a while. The earth was put
back in and packed as tightly as possible around the mould. All we had to do
now was do it. I had simply been ignoring the fact that at some point I
would have to actually pour the keel. If it went wrong it would mean much
complication and certainly expense and lost time. It didn’t bear thinking
about. Which is why I didn’t think about it. More than once I asked myself
what I was doing.
We started early and Gus got the fire going, as it got hotter we added more
and more logs until an hour or two later we had a roaring and extremely red
fire so hot you couldn’t get near it. The lead started to melt quite quickly
and it was fun to see the pigs collapsing. To get the whole three tons
liquid took about 4 hours.
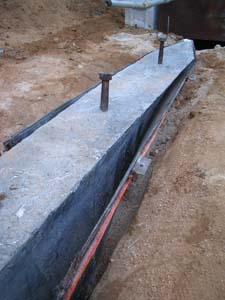
In retrospect the keel pouring was an anti climax. I opened the tap, nothing
happened so we heated up the short outlet pipe with a serious blow torch and
suddenly out it came. A mere 5 minutes later we were done. I shut the tap,
the flow stopped and there was a keel already starting to cool at the
extremities.
The next
day Cristophe dragged it out of the ground with the digger and we were faced
with the prospect of dragging it into the shed a distance of 6 metres over a
sandy surface. Gus solved this problem brilliantly. Why didn’t we use the
old keel (which was in the shed) to pull in the new one? The chain hoists
were attached and we heaved it in slowly. Once under a beam it was easy to
lift it up in order to clean it up and lower it onto a cradle so it could be
moved about. 4 holes were drilled into the floor and steel bar inserted.
These were the anchor points for the chain hoists. The keel could now be
moved in any direction.
The keelson had certainly straightened out during the two months resting
with all the boats weight in one place. It still wasn’t straight but it was
a considerable improvement. One added bonus was the straightening of the
rudder post which previously was also bowed. The top of the keel was cleaned
up. I found the electric plane to work best especially when used backwards.
All the chippings were gathered to be melted down later.
The underneath of the keelson was painted and repaired in places. The boat
was lowered onto the keel and the floor bolt holes marked from above. The
keel was dragged out again and the holes tapped to a depth of about 7 cms. A
special tap was bought to enable us to cut a thread 20mm in diameter. This
took some time but wasn't as hard as I thought it would be. 6 x 20mm bolts
were then made in varying lengths from about 30cms to over 100cms begging
the question how did the boat yard do this. Did they lower the boat over a
metre onto the keel? All the bolts are in the same plane so it’s possible at
least. Above Alexandra was a mere 30cms so there was no choice for us.
The boat was bedded onto the keel with 3M 5200 polysulphide. 8 tubes were
squeezed onto the keel and the boat lowered onto it. I reckon you could
leave the keel bolt nuts off and that keel could never fall off. I pity the
poor bastard that has to take the keel off next time, luckily I’ll have been
dead for about 50 years so they can curse me all they want!
Finally the keel was done. We all went out to our favourite restaurant to
celebrate. Between Gus and I we did 400 hours work and 3 months had passed
since we first put Alexandra in the shed. “What a job!”
Now I could start on the woodwork. First were the frames, a bit bigger than
the ribs at 35 x 30mm. Here was a chance to get the boat in shape a bit
more. Since the steel floors couldn’t move but the wood could, there was a
bump by each floor so this was remembered when I fitted the frames.
Gradually she straightened up a bit. There were 18 frames to replace. They
were oak originally and steamed but since I had no desire to take off the
plywood deck to gain suitable access decided to scarf them on to the
existing frames using ash, which likes epoxy and bends well. It’s easier to
work than oak and in its laminated form is probably as strong as the
original oak. The main reason I used ash was in the hope that the steel
bolts that are fitted through them will not corrode so readily as if they
would in oak.
After the frames, the ribs, all 36 of them. Some of them had unbelievable
bends and even thin laminations were only just doing it. How those original
boatbuilders managed to steam them round remains a mystery. They must have
broken so many.
6 weeks passed doing the frames and ribs. Now that the skeleton was repaired
I could do the skin. We bought 50x 3metre long planks in varying thicknesses
from a wood yard in Belgium, Honduras mahogany as original, mainly because
some of the interior is varnished. It’s a nice wood to work but it made my
hands go black for the whole time I was doing the planking.
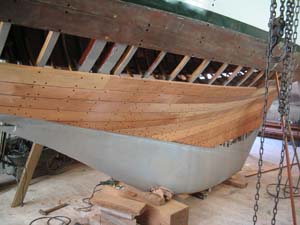
Alexandra’s planks are 16mm thick, tapering towards the ends, down to as
little as 12mm. It’s clear to me now that Knud Reimers was a great designer
but he was no boat builder. I can well imagine the curses as those poor
builders tried to get a piece of wood to bend into one of Alexandra’s
amazing curves. The first 6 planks on each side were steamed in. I would
make a template of the plank I wished to change from thin strips of 3mm ply.
These strips are tacked to the top and bottom of the space and held there by
gluing on vertical strips making a strong whole that doesn’t change shape.
This is placed onto the plank and it is marked with a very sharp and
concentration inducing Japanese marking knife. Then the jigsaw is used to
cut close to this line and after the block plane cleans it up. A bit of
trimming here and there and the plank is ready for fitting.
I decided to start at the bottom and work up. This way I would be able to
fit the last planks on a convex part of the hull, since they would not be
trapped by their neighbours. Originally Alexandra was planked up with no
caulking of any kind but I decided to spline the hull since there would be a
mixture of old and new planks and to get planks fitting with that sort of
precision takes much longer to achieve. We didn’t have the time. Some of the
original planks had really shrunk so a spline wood was needed that could
compress well and take up the slack, producing a tight hull but without
stressing the structure too much. Red cedar fitted the bill perfectly and I
had the local wood yard cut me 200 metres of angled splines with the grain
running in such a way as to maximise the compressibility.
Nowadays splines are made by routing a square section between two planks, a
difficult and slow process. I figured it would be possible to put the bevel
on the bottom of each plank and pre make the slot for the spline. This way
it would taper and allow me to glue only the top of the spline to the plank
so that if for some reason a plank needs removing, it won’t be stuck to it’s
neighbours. Since I was going to replace most of the planks under the
waterline I could pre cut most of the spline slots leaving only about 20
metres to do. A special hooked blade was made that very efficiently opened
the slight gap and left it clean for the splines.
It was Gus’s job to fit the splines. He used a staple gun to hold the
splines in place, as far in between the planks as possible. Just before the
epoxy had gone off the staples were removed. Another job for Gus was making
and fitting the plugs. All 2000 of them in two sizes, ½ inch and 5/8 th of
an inch, the larger ones being the floor bolts. The bigger plugs were glued
in with PPU glue so that they might be removed more easily when the
galvenised bolts are wasted. After the plugs were done I went round with a
chisel and a mallet and bashed off the plugs, leaving just a little to sand
down.
The bottom concave planks were fitted by steaming. The planks were soaked
overnight and spent a good hour being vaporised. Speed was called for here,
not only that but organisation. Clamps were laid on the floor ready opened
for use. The plank was put in rough position and clamped up. When it had
cooled the clamps could be loosened and the plank knocked down to sit on the
one below it. The next few planks were shaped. An old wooden plane was
modified to cut a concave shape to the planks. After planing I used 60 grit
sand paper on a long and convex block. After fitting the planks to the boat
they needed final shaping. This was done with a belt sander on the convex
areas and a spokeshave used across the grain on the concave stuff. It worked
surprisingly well and I was very pleased with the final shape of the
planking.
Planks done now, she was looking good, almost a shame to paint it. Still
much work needed to be done. As I was doing the planks I realised the full
extent of the rot in the wooden floors so they all needed remaking.
Originally these huge 60mm thick monsters were made from crooks of Oak but
there was no chance I’d ever find anything like that so I didn’t even bother
to try. I used instead Sapeli which is a hard wood and relatively easy to
work. I made the floors out of many pieces and laminated them up into one
extremely strong structure. Rather than drill the holes for the floor bolts
later I routed out a groove in the two centre sections so that when joined
they left a space for the 20mm floor bolts. Further more doing it like this
meant that the groove could be coated during assembly. I’m a firm believer
in a coat of something before you fit it. Every rib, plank and floor was
painted before fitting and this I’m convinced can add years to the life of a
wooden boat. It takes longer of course which means it costs more, but well
worth it.
All that was now left to do was to refit the new galvanised steel floors.
Only I didn’t have them yet. Alain had underestimated the complexity of the
shape and it was taking longer than he thought. Added to the fact that Alain
works full time too meant that I was starting to get nervous. It was the
fault of the galvanisers of course but anyway they turned up in the end and
were no problem to fit. While the planks were being made I had help in the
way of Luc’s son, Willem and his girlfriend Karlein and their friend Peter.
It was their job to strip and re-varnish the interior. I had tried to tell
them not to underestimate how hard the job would be but they were keen and
enthusiastic and being young obviously thought I was just being a stupid
adult who knew nothing about anything. After a week they admitted that it
was harder than they thought but to be fair stuck it out and did a nice job.
Just paint to do. Although it’s called a 6 metre the whole is nearly 12
metres long. That’s a lot of boat to sand by hand. This job was rendered
less demoralising by throwing much labour at it. Even my cousin lent a hand
and I don’t think I’d ever seen him working before.
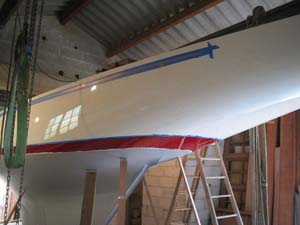
The final coat was rollered on and laid off with a brush and looked mighty
fine. One tin of white and one tin of off white was mixed together to make a
very subtle shade of white. The gold cove line was re painted rather than
using the previous stuck on affair. The boot top was changed to a lovely
rich Burgundy colour, strangely enough not available in France. So it was
ordered from the UK along with red bilge paint which is not available in
France either. Strange. Black antifouling completed the look.
José was called and agreed to come and collect the boat. Meanwhile it was
our job to “walk” the boat as far out of the shed as possible using the
strops and hoists. This done we waited for José. And we waited and waited.
Competent, yes. Reliable, no. Still he did at least turn up and once again
we found ourselves working in the dark despite it being practically the
longest day. It would be a shame to break with tradition after all. However,
the fact that it was dark in no ways diminished José’s skill in moving a 12
metre long boat about in incredibly tight spaces. I guess he must have a lot
of practice!
The following day Alexandra was launched with little ceremony. It was a
small gathering. Luc, Willem and another son, Karel and yours truly were
there. We were very interested to see how the boat would sit on her lines.
We had no reference points to work to. No photos of her at rest, merely the
dirty water mark left where it was floating the last time and since the boat
was often full of water this was not to be relied upon. At the end of the
day it was pretty much guess work. There had been talk of fitting a diesel
engine although I was strongly against this. A good compromise might be an
electric motor but in any case it was clear that something would be fitted
in the future so if anything we wanted her to be slightly down at the bows
so that when the engine or batteries were fitted she would be level. I was
very pleased and relieved to see her floating happily once again and as near
perfect on her lines as you could wish. Phew.
The next two weeks were spent re painting and repairing the decks which were
too close to the roof in the shed to do before. Besides, the weather was
getting very dry and new cracks were appearing daily in Alexandra’s top
sides. It was obvious that she needed to get back in the water. New toe
rails were made, the varnish was quickly done, winches and blocks replaced
and the rigging sorted. In typical last minute fashion the final touches
were made to Alexandra just as Luc arrived to start his holiday. The
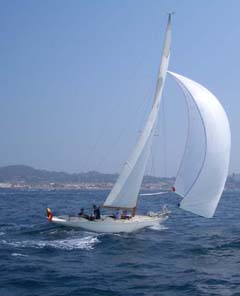
following day we went sailing. My hands still carry the scars from pulling
on the ropes that day. Luc, Gus and I begged a tow and set off. As soon as
the sails were up we shot off at over 7 knots pointing very high considering
how tired the main was. She was very nicely balanced and light on the helm,
Responsive and communicative, a true thoroughbred in every sense.
We got soaked when the wind picked up to about 18 knots and we carried on
smashing to windward at an outrageous angle of heel. I thought if anything
is going to break it will do it now. We changed down to the no 3 jib, no
easy task on a fine and pitching fore deck, and that settled her down a bit
but although not strictly traditional, I suggested the new main have one
reef just for cruising. That much strain won’t break the boat but nor will
it do it any favours. Alexandra is very lightly built, the hull alone
weighing only a ton despite being 12 metres long, and to abuse her like this
all the time will surely shorten her life. In the past a ring frame has been
added and the frames that support the chain plates had been enlarged but I’m
in two minds as to whether this is a good thing or not. It was probably put
there because the leakage was put down to movement due to the mast and
rigging. I suspect it was done instead of replacing the necessary parts. Now
that Alexandra is stronger than ever perhaps she no longer needs them. The
racing rules allow for two ring frames by the mast so it is clearly a common
modification.
Alexandra was entered in Les Voiles Des St Tropez in October and the
DeCramers once again raced hard. It pleases me greatly to see them using the
boat as she was intended. Alexandra certainly safe guarded her future when
she was found by the DeCramers. Here’s to the next 60 years.
